Compartilhe
- Gerar link
- X
- Outros aplicativos
Navigating Linux
Day2, Navigating Linux — 100DaysofHacking
Day1: Installing Kali Linux
Hello Everyone, this is Ayush if you haven’t read the previous blog then you can read it by clicking on the above link.
Now, in our previous article we have successfully installed Kali Linux, today we’ll see about some basic commands, basic directories n all so let’s start.
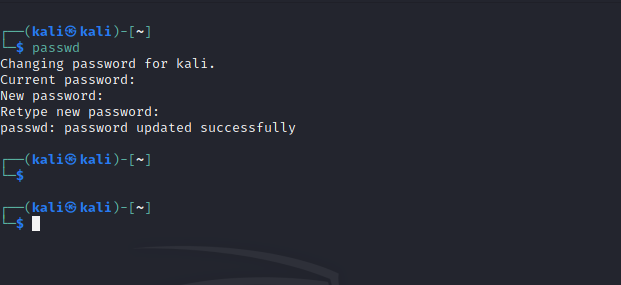
The first thing you should do after installing linux is to change your default password , you can do it by entering following command in terminal, to open terminal hit : ctrl+alt+T
Command: passwd
This command will change the password for the current user which is kali.

Default Users
Kali Linux contains two default users ‘kali’ and ‘root’, in both of them root user has higher privileges than the kali user.
If any command needs root permission then we usually take the help of sudo(sudo allows a permitted user to execute a command as the superuser or another user) command.
Now to log in as a root user you’ll need to first change the password of the root by using the above command as shown in fig:

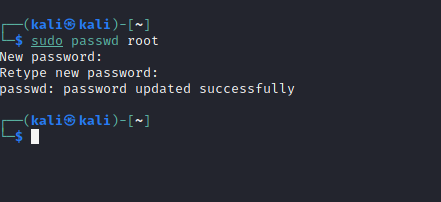
Here I have used sudo because I can’t change the password of the root user as default that’s why.
You can log in as root by entering the username: root password:you_know_it.
Or you can also log in through the terminal by applying su command.

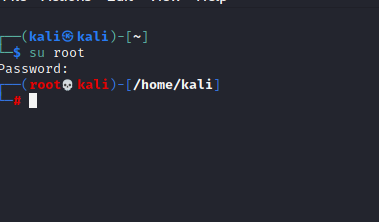
Command: su (short for substitute or switch user) utility allows us to run commands with another user’s privileges, by default the root user. If you don’t provide any user then by default it’ll ask password for root.
Now, moving forward we’ll talk about Linux File System.
The Linux File System:
As we know every OS has its own file system like Windows has NTFS, similarily Linux has also filesystem called EXT4.
There are many directories inside the Linux filesystem and the first directory is the root directory, now we’ll learn about some common directories which we should know.
/bin — basic programs (ls, cd, cat, etc.)
/sbin — system programs (fdisk, mkfs, sysctl, etc)
/etc — configuration files
/tmp — temporary files (typically deleted on boot)
/usr/bin — applications (apt, ncat, nmap, etc.)
/usr/share — application support and data files

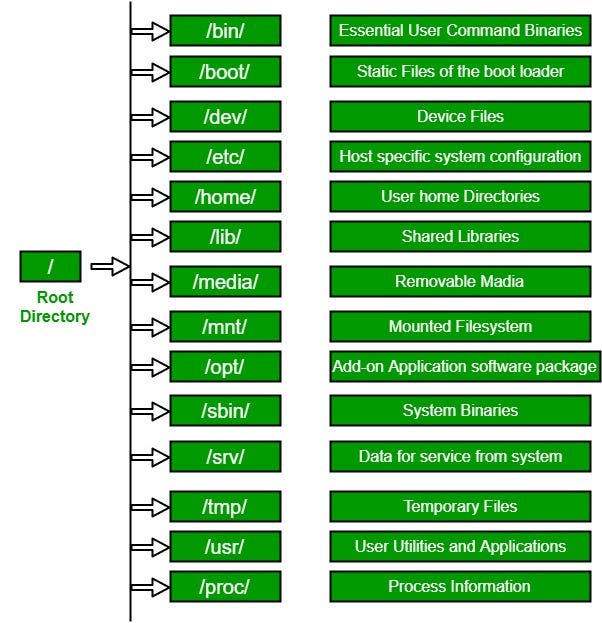
In the above image, you can see the detailed structure of LFS.
Now moving forward we’ll learn about some basic commands
Basic Commands
In Linux, many commands provide formal piece documentation called manual or man pages. To see a description of any command just hit man cmd_name.
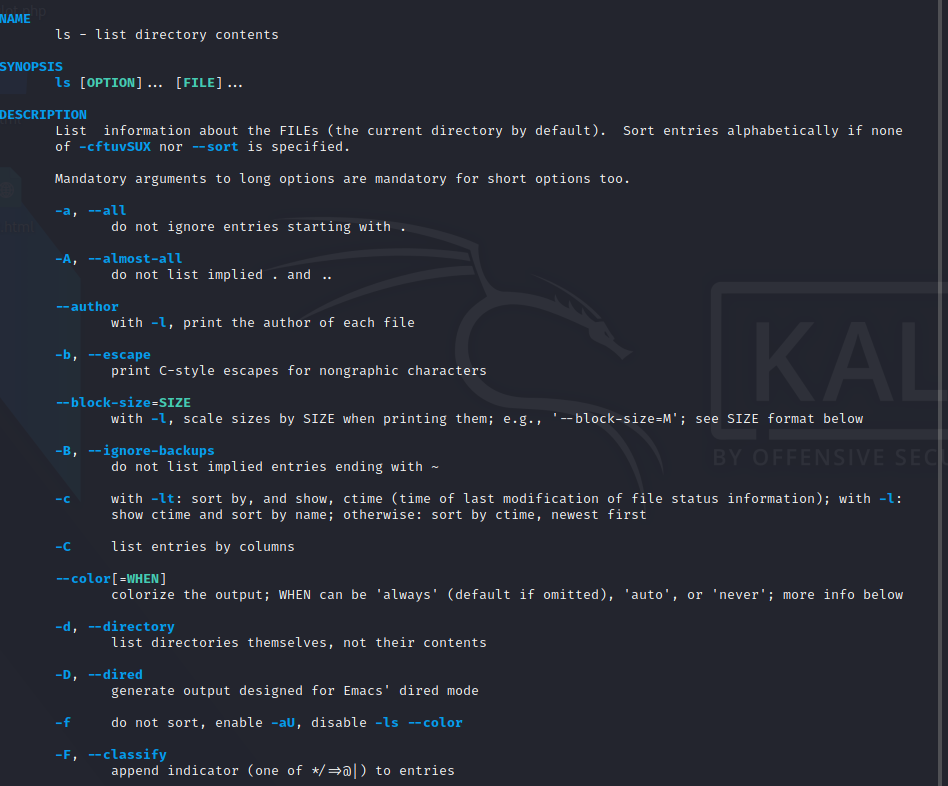
From the man page, you can read the description of each and every flag which we can use or also we do ls — help

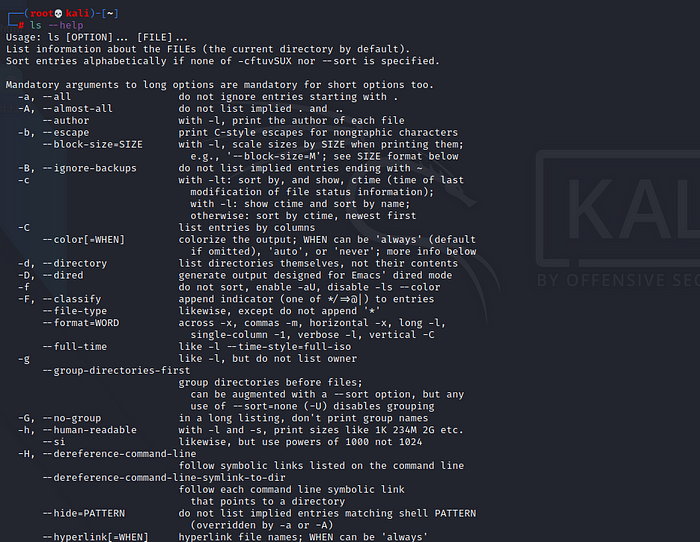
Now you got an idea of how you can do self-learning about different commands, but before that let’s talk about different commands:
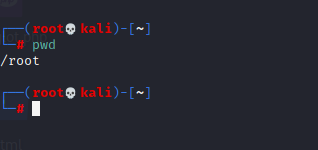
1. pwd: pwd stands for present working directory which tells us about in which directory you are currrently working in.

2. ls: ls stands for list directory(folder) , means it’ll show us which files and folders are present in current directory in .

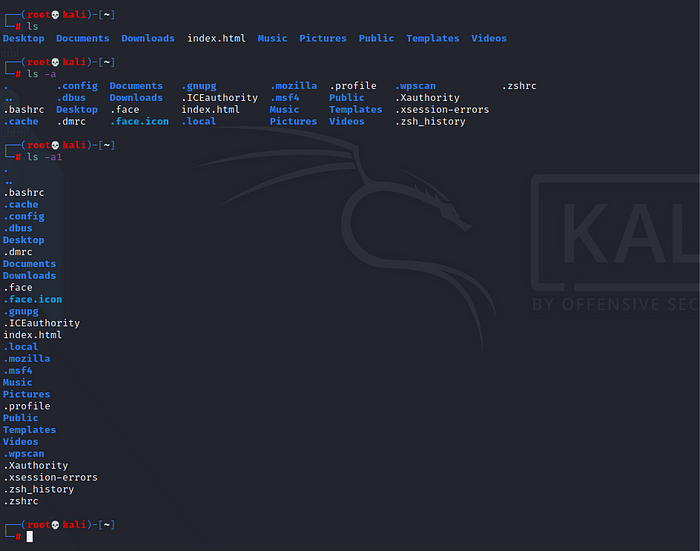
Here in the above image, we have used simple ls then it was showing fewer folders but when I did ls -a it showed us the hidden directories, so -a option is used to find the hidden directories and -a1 to get results in the same line.
3. cd: cd stands for Change Directory, it means we use this command to change directory from one to another.

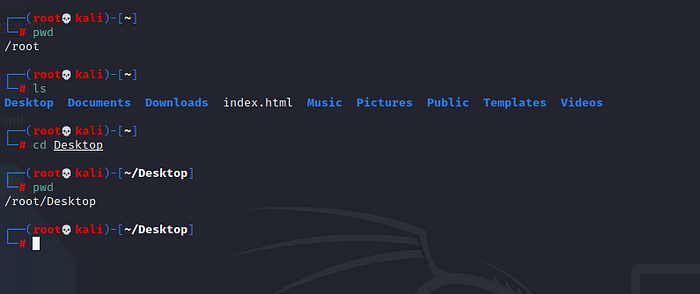
In the above you can see first we were in root directory then we changed the directory with the help of cd command from root to Desktop.
Remember in Linux Desktop and desktop is different.
To go back : cd ../ or ..
Return to home directory: cd ~
4. mkdir: mkdir stands for make directory , we use this command to create new directories.


To create multiple directories, we can do like this:

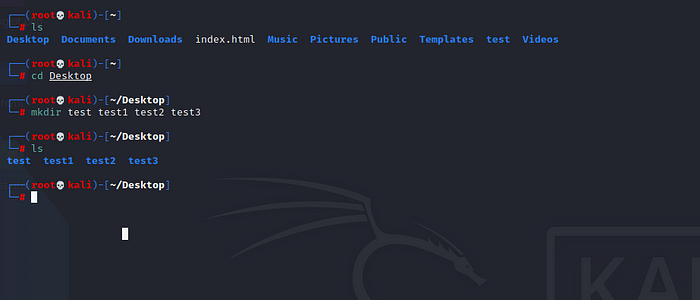
5. rmdir — rmdir stands for remove directory, simply we use it remove any directory which is empty.

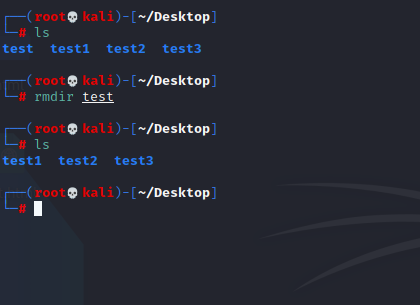
To remove directory which is non-empty we use rm -rf dir_name.
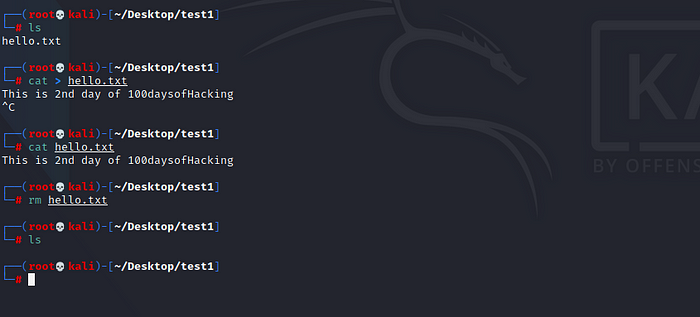
6. touch: touch is a command which we can use to create any file.


To write something in touch command we use cat followed by > (greater than operator).
7. cat: To create,read or write file.


8. rm — To remove file we simply use rm command.

9. cp: it is used to copy files and folders.
syntax: cp file_name /full_path

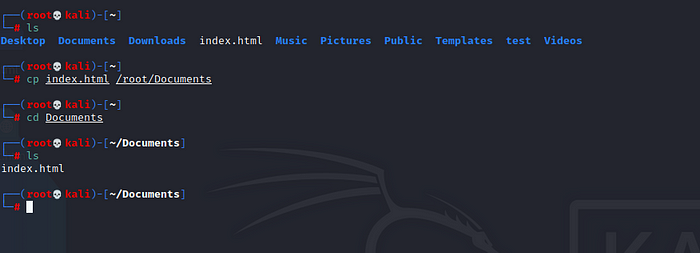
In the above image, you can see we have copied index.html from the home directory to Documents.
10. mv: mv command is used to move files and directories.
syntax mv file_name /full_path

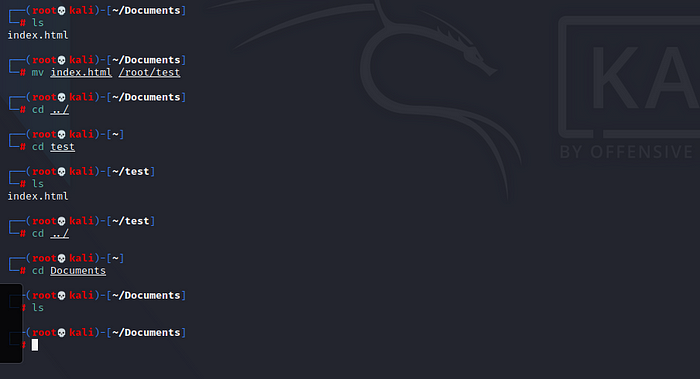
In the above image, you can see we moved index.html from Documents to test.
Thank you for reading till here I hope you liked this blog, if yes then please hit a clap button in case of any queries just ping me on Instagram, click_here :).
You can also checkout our github repos of 100DaysofHacking.
So once again Thank You, Happy Hacking, will meet in the next writeup :)
Postagens mais visitadas
🇧🇷 Ferramentas OSINT mais usadas por policiais no Brasil
- Gerar link
- X
- Outros aplicativos
OSINT APLICADO À GOVERNANÇA
- Gerar link
- X
- Outros aplicativos
How to Install Kali Linux NetHunter Rootless on Android (No Root Needed!)
- Gerar link
- X
- Outros aplicativos


Comentários
Postar um comentário